
IWhen i done my first photogram i put the aperture of the enlarger on 7.4 and i done it for 2 seconds but it didn't work out well as curtain parts of the objects i put on was not shown,such as ; a key, a film strip. I thought if you exposed the light for at least 2 seconds then the picture will be a bit lighter and the objects will stand out. My second one turned out better as i exposed the light a little shorter for 1 second, my objects turned out great they was all shown and that they stand out a lot more as the object are white and the background it black. We have to put the shiny paper upwards but on my test papers i didn't have enough room to put more objects on as it didn't fit. When we had the bigger paper i put more objects on so it made it better so it looked busy but not to busy. it just so all the objects stood out but when you put to many objects it could look good as it could have half an object of the paper which would look good. When you do a photogram it is better that you expose it for 1 second as it will turn out better and all the objects will stand out a lot more. The object I used the most was scissors which makes a good effect when doing photograms, as its big which stands out and it is a good shape for when doing photograms. It shows all the detail parts of the scissors and the out line of the scissors are clear.
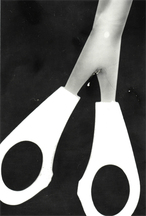
This picture has been exposed to light for a good amount of time, as the image stands out every clear making the background black. If this was exposed to long it would become not clear enough to see. Maybe this person has thought clear and must of had a couple of tries doing it as it looks like a professional photogram. This photogram would of had a lot more in as it would of made it better and not boring to look at as people get very bored unless it gets them thinking of what is in the picture and what meaning it might have towards it.
This photogram has a good exposure as it shows all the detail within the picture, all the detail in the scissors. If this person was to do this again i would say to maybe put more objects in to it , expose it for less amount of time as you want people to draw their attention to all of the objects not just the bright bits on the object.
This photogram has a good exposure as it shows all the detail within the picture, all the detail in the scissors. If this person was to do this again i would say to maybe put more objects in to it , expose it for less amount of time as you want people to draw their attention to all of the objects not just the bright bits on the object.
How To Do A Photogram
Once your ideas are arranged in your head, your items ready for setup and your work station ready with all the needed chemicals, you are good to start ! Turn off the lights in your room, and make sure no one opens nor barges in your room, the paper is highly sensitive to light and so any light source entering from outside your room can potentially ruin the whole given process. Not to mention that of your classmates as well.
Take your light sensitive paper and start to arrange your items in any stylish fashion. Make sure you turn a orange or blue safe light on for visibility. Be as creative as possible, make that brain of yours work !
Once your items are setup, grab any light source at your disposition ! a phone works perfectly ! expose your picture for 5-10 seconds. Note that by shortening or lengthening the time of exposure you can control how dark you want the background of the silhouettes to be. The shorter the time, the lighter the shade ! Fairly straightforward my friends !
Once your paper exposed you are ready to develop ! Have your developer, your stop and your fix bath ready. Once you feel brave and confident place your light sensitive paper in the developer bath for 1 minute. Make sure that the paper sits at the bottom of the bath or chemical won't develop your whole image. Note that it is required to shake often in all of the three chemical process.
When one minute has passed, grab your image with a pair of tongs and place it diagonally in the air like that of a diamond shape so that all of the chemical drip off the paper.
Once all of the chemicals gone
When thirty seconds has passed, grab your image once again and place it diagonally as previously explained so that all of the chemical drip of the paper.
Once the paper dry, place in your fix bath for 2 minutes. Make sure your paper sits at the bottom of the bath and shake regularly. You are almost there don't give up !
Once the process is finished, you are free to open the lights. You are also welcomed to gaze in awe at your beautiful piece of art, but wait it doesn't stop there ! Take your image to the sink and soak with warm water for 5-10 minutes.
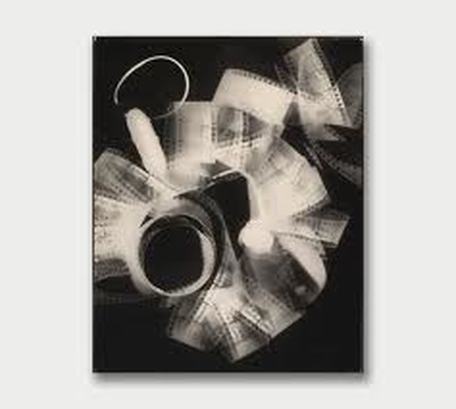
This is one of Man Ray piece of photogram as you can see Man Ray has used a collection of film tape to create an magnifying glass. He has made it not look busy but he has tried to fill up the spaces and he done just right enough. This photogram has a good composition. The image is very interesting to look at to see what type of objects was use and what man ray was thinking at the time to make this photogram.
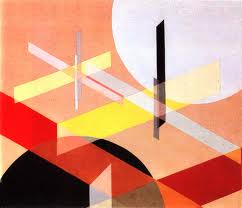
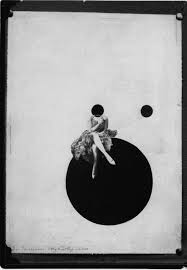
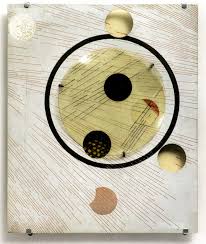
This is some of Moholy Nagy pieces of work, the first picture looks good as it has colour which makes it stand out from all the rest of his pictures showing. The good thing about Moholy Nagy pieces of work doesn't have much going on in the picture so it helps a lot as he has thought about not making his pictures to busy, if was to busy it would look good as you wouldn't be able to see any other things going on in the picture. The second picture must have some sort of meaning to it as why would a girl be sitting on a circle. This makes people think of reasons and give then thoughts as it might have a story behind it. The last picture looks a bit unusual and maybe for these sorts of pictures should have more going on to tell what is happening in the picture.
